Quantcast
Channel: Layout & Editing | Graphic Design Ideas | StockLayouts Blog
Viewing all 37 articles
Browse latest View live

How to Lay Out a Multiple Page Newsletter, Magazine, Booklet, Brochure, or Catalog Design for Print

$
0
0

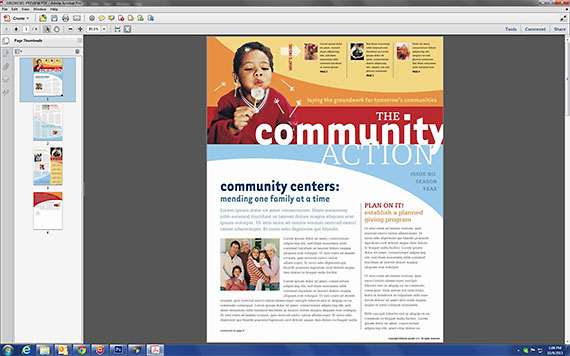
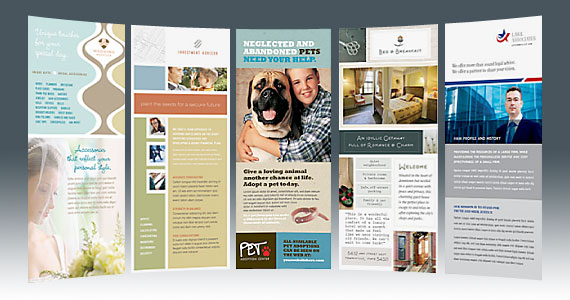
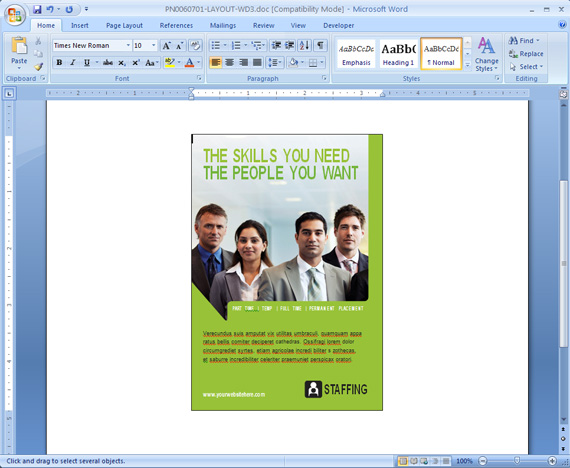
The order of the pages when laying out a document for print is quite different than the sequential order in which a document is read. If you start with a StockLayouts Newsletter template, your file is already layed out as four pages on two document spreads. The first document is your front and back cover, while your second document is the two inside pages. Once printed back to back and folded, you will have a complete and properly ordered newsletter marketing piece.

Adding additional pages

When four pages is not enough for your needs, creating additional pages is easy. While there are many ways to achieve this, the most efficient way is to duplicate the inside page then rearrange graphics from throughout your design to make each page unique.

Imposition: The arrangement of pages

Newsletter Imposition Spread OrderWhere to lay out each page is important to printing your piece properly, and will vary depending on the number of pages in your document. You may want to check your software’s help guides for built-in imposition tools.

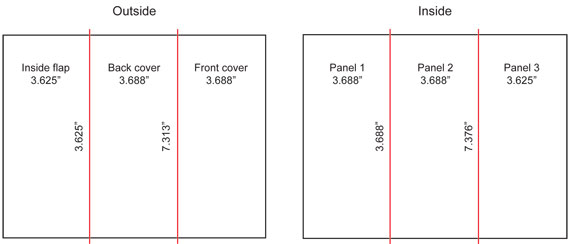
Let’s look at an example. If you want an eight page document you will need four document spreads. The image to the left shows where each page should be designed on your layout spreads. Newsletter Imposition Page Layout OrderYour first page will always be the right side of the first document spread, while your back/last page will always be the left side of the first document. The page numbers ascend from 1 and descend from 8 (or the number of your last page) with the odd numbers on the right hand side of each spread and the even numbers on the left hand side of each spread. The image to the right shows how the four spreads are then printed and collated.

Restrictions on the number of pages

Note that for documents in which the number of spreads required is an odd number or a fraction, the final document will not have a document to print to the back. This cannot be bound after printing, therefore documents must be printed in multiples of four. For example, you can have a 4, 8, 12, or 16 page document, but not a 6, 10, or 15 page document. For a six page document you might consider an 11″ x 24.5″ tri-fold design.

Try it now! Download a free sample Newsletter and try it for yourself!

Learn more! More advanced users will find About.com’s resource helpful.


Filed under: Layout & Editing Tagged: catalog layout, Graphic Design, imposition, magazine layout, newsletter layout, templates

How to Convert a Newsletter, Brochure or Catalog for Print into Consecutive Pages in a PDF

$
0
0


Businesses often need to send or post their completed newsletter, brochure or catalog online. The easiest and most practical format for distributing a document is the PDF. The PDF is superior to other formats because everyone has access to it, your document maintains its format, and you can secure the document from being edited. However, if your document is an 11″ x 17″ spread laid out for print, your document will not read in consecutive pages. You will need to divide the document into individual 8.5″ x 11″ pages. There are two methods for dividing your print layout: by cropping your PDF after it has been created or by manually dividing each spread into new documents.

Consecutive PagesMethod 1: Create and Crop Your PDF

The fastest way to separate your template into individual pages is to create a PDF of the document and crop it within Adobe Standard or Pro. Note that Adobe Reader does not have this capability. If your text spreads across the fold line, you will want to rearrange those elements. Once you are ready to crop your PDF, follow these steps:

  1. Create your PDF.
  2. Copy each spread in the Pages panel, so you have two of each document.
  3. Tip: To copy a page, hold the Ctrl and Option keys and drag the page thumbnail to a second location.

  4. On the first spread, right click on the thumbnail in the Pages panel and choose Crop Pages.
  5. Under margin controls, enter 8.5 into the box for the left margin. Click Ok.
  6. On spread 2, enter 8.5 into the box for the right margin. Click Ok.
  7. On spread 3, enter 8.5 into the box for the right margin. Click Ok.
  8. On spread 4, enter 8.5 into the box for the left margin. Click Ok.
  9. Drag the second page to the last spot on the Pages panel.

Method 2: Manually Cut and Paste the Template into New Documents

If you do not have Adobe Pro, you can still manually divide your design into consecutive pages. You may have to readjust text or graphics that lay across the fold lines before dividing your spreads.

  1. Open your design. Some applications, including Microsoft Word, may have two documents.
  2. Create a new document with four pages.
  3. Select the right half of your first spread.
  4. Tip: For help with selecting objects in Microsoft Word visit Office Online’s help guide.

  5. Group the objects.
  6. Copy and paste into the first page of the blank document you created.
  7. Repeat the steps to place the remaining pages into the appropriate blank pages.
  8. Create a PDF when you are finished.

Filed under: Layout & Editing Tagged: create pdf, crop pdf, page layout, print catalog, print magazine, print newsletter

How to Set-up Bleeds on a Microsoft Publisher Document for Professional Printing

$
0
0

Here’s the situation: Your home computer or office does not have professional graphic design software, and you wouldn’t know how to use it if you had it. So, you’re taking the path of least resistance and using Microsoft Publisher to create your marketing materials. You’ve completed your design and are hurriedly sending it off to your printer, who informs you that your design needs “bleed”. With pictures of battlefield injuries in your head, you tell your printer “Yes, of course, bleed.”

Bleed in Publisher Design

What is bleed?

Simply put, bleed is a slight overlap or extension of the printed area added beyond the borders of a printed page to make sure graphics or solid colors go right to the edge after trimming. No printing device can print right to the edge of a page, so a slightly larger impression must be made and then trimmed back with a cutter. If you design the page without blocks of color, photos or graphics going right to the edge of the page, you don’t need bleed. But if you do, and you don’t want a slight error to cause the cutter to miss the edge and leave white around the edges, you’ll want bleed.

Do you need bleed?

Home and office printers cannot print to the edge and will leave a white margin, cutting into your design. If this is good enough for your purposes, read no further as you do not need to add bleed to your design. For borderless, professional printing, bleed is required by most commercial printers, and is recommended for the highest quality print output.

Create bleed

Before you start adding bleed to your design, be sure you do not have important design elements or text boxes closer than 1/8 inch to the inside edge of your document. Staying within this safe zone ensures your design will not cut off important content after printing and trimming.

To ‘fake’ a bleed in Publisher you will need to change the paper size, adjust the graphics and then return the document to the original size before creating a PDF or sending your .pub file to the printer. Start by opening the Page Setup dialog box. Go to File > Page Setup. Under Page, enter the dimensions required for your document. You need to add 1/8 inch (.125″) of bleed on all four sides of your document. This will add an additional 1/4 inch to both the width and the height of your document. For example, if your document is 11″ x 17″, your new document size will be 11.25″ x 17.25″.

Next, adjust the graphics to the edge of the document. You may scale vector objects, but be sure you do not distort photographs. Use the crop tool where possible. Grouping graphic elements will allow you to move elements together and make the adjustments quicker.

Once you have adjusted your design, change your page size back to 11″ x 17″. The graphics touching the edge will then extend beyond your publication page by 1/8 inch.

Printing with bleed in-house

If you would like to print your design on your home or office computer with bleed, follow the set up instructions below. Remember that you must print your document on a larger sheet of paper to allow for your bleed and crop marks.

  1. On the File menu, click Print, and then click the Printer Details tab.
  2. Click Advanced Printer Setup, and then click the Page Settings tab.
  3. Under Printer’s marks, select the Crop marks check box.
  4. Under Bleeds, select the Allow bleeds and Bleed marks check boxes, and then click OK.
  5. In the Printer name list, select the printer that you want to use, and then click Print.
  6. After you print, trim the paper to the size of the publication by using the crop marks as your guides.

Printing with a commercial printer

Most printers will require a PDF of your design with full bleed and crop marks. Check with your printer for their specifications and requirements.

Bleeds in Microsoft Word

While it is possible to print a Microsoft Word document with bleed, the process is tedious and not recommend. You can follow the steps above to create a document size large enough to accommodate the bleed, however Word does not allow your document to extend past the document size and does not offer a way to include crop marks. Check with your printer for their specifications and requirements if you choose to use Word. If your printer is not able to help, try Printingforless.com. They will work with you to get your design professionally printed.


Filed under: Layout & Editing Tagged: bleeds, commercial printing, marketing materials, microsoft, templates

Create Annual Reports Using Your Existing Brand Materials

$
0
0

Creating annual or business reports can be a time consuming, yet necessary, tool for your business. These reports are often thrown together with a free Word template that has little visual appeal. However, even if you don’t have the time or resources to involve a graphic designer, you can still create something great yourself! With a little effort you can use your existing graphic material to spice up a boring report.

Formatting

Most annual reports contain the same core ingredients. Below you will find the basic format you should follow in your report. Tailor it to your own needs as required.

Front cover
TOC
Year in highlight
Letter to the shareholders
Management discussion and analysis
Auditor’s report
Financial statements
Conclusion
Corporate information and contacts
Back cover

It’s always wise to lay out your content before beginning your design work. If you need guidance on laying out longer documents please visit this blog article.

Your Design

Gather up your existing brand materials and start designing! If you don’t have brand materials yet, visit StockLayouts for professional graphic design templates. Start by making a copy of the original. Work off the copy in order to preserve your original. Use the front and back covers of the design for your report covers. Your front cover should be highly graphical with your logo and a little text to convey the subject of the report. If the cover of your current design is heavy on text, remove body text and use headers and minimal copy to convey your message. On your interior pages, use graphic elements from the layout to add a touch of visual interest. You may need or want to insert photos, financial documents, or charts of your own. Most applications have built-in utilities for creating charts and graphics. Add your content to your design and you’ve created a professional report on your own!

Example

The 8-page report pictured below was created entirely using graphics from one 4-page brochure! View the original design here. By re-purposing an existing brochure, we created an annual report that looks consistent with the brand and didn’t cost a penny.

Pages 8 & 1

Annual Report Redesign - Pages 8 & 1

Pages 2 & 7

Annual Report Redesign - Pages 2 & 7

Pages 6 & 3

Annual Report Redesign - Pages 6 & 3

Pages 4 & 5

Annual Report Redesign - Pages 4 & 5

Graphic Design Resources

View more professional templates from StockLayouts.

Learn how to customize templates easily and quickly with Graphic Design Tutorial Videos.

Download the StockLayouts Graphic Design Catalog of professional print layouts to use as a creative resource.

Try a free sample and see how easy templates are to customize!


Filed under: Graphic Design, Layout & Editing Tagged: annual report, business report, company report, financial report, financial statement, small business

What are the Dimensions of a Tri Fold Brochure?

$
0
0

Tri Fold Brochure

Tri-fold brochures are one of the most commonly used marketing materials, but can be one of the most challenging to design. There are many details to consider when laying out a tri-fold brochure, including paper size, fold lines, content layout, and file preparation. This article serves as your guide for setting up a tri-fold brochure for professional printing.

Paper size

The possibilities are endless when it comes to choosing the size of your brochure. There are no limits to your creativity, nor should there be in your design. However, if you want to create something easy to design and print, you may want to stick with one of the standard sizes below. Throughout the rest of this post I will focus on the most common brochure size, the 8.5″ x 11″ tri‑fold.

8.5″ x 11″ (Letter)

The standard ‘tri-fold’ is actually three panels with only two fold lines. It can be handed out, placed in a brochure rack, or easily mailed. This size is also often used for take-out menus.

8.5″ x 14″ (Legal)

Legal size tri-folds are not as common, but are still used today. With three extra inches of total length, each of your panels will allow a bit more space for content.

11″ x 17″ (Tabloid)

Although frequently used as a half-fold brochure or menu, this paper size can also be used as a tri-fold.

11″ x 25.5″

The much larger 11″ x 25.5″ brochure is comprised of three 8.5″ x 11″ panels, and is used for lengthy, more robust brochures.

Fold Lines

Novice designers assume that a tri-fold brochure folds into three equal parts, but this is not the case. A little extra room is required to account for the thickness of the paper in the fold. While creating a design with three slightly unequal panels isn’t the end of the world, your result will be more professional if you make this adjustment. Below are the correct fold lines for an 8.5″ x 11″ tri‑fold brochure or pamphlet:

Tri Fold Brochure Dimensions

Outside: 3.625″ & 7.313″, creating 3.625″, 3.688″, 3.688″ panels.

Inside: 3.688″ & 7.376″, creating 3.688″, 3.688″, 3.625″ panels.

Layout

Outside Spread

The outside spread of your layout consists of the top of your inside flap, back cover, and the front cover. Please note that the graphics on each panel will stand alone when the brochure is folded. This doesn’t mean you can’t design across the panels, but double check that each panel looks good on its own.

Tri Fold Brochure Outside Spread Fold Lines

Inside Spread

The inside spread lays flat when opened and the design does not necessarily have to be compartmentalized into panels. Your design will look more fluid if you design across the page.

Tri Fold Brochure Inside Spread Fold Lines

Print ready

For optimal print results, it is important to make your file print-ready. Most printers require full bleeds in a design. The graphics in your design should extend .25″ beyond the paper size (.125″ on each side). Also be sure to lay out text and important graphics within the safe zone, a .125″ area within the paper size. You can print your design on any stock paper of your choosing, but brochures are generally printed on 80 to 100 lb. stock. Ask your printer for their recommendation if necessary.

For help with adding bleeds to a Publisher document, please visit How to Set-up Bleeds on a Microsoft Publisher Document for Professional Printing. Note: It is not recommended you attempt to add bleeds to a Microsoft Word design.

For blank templates and more details on setting up your file for print, visit one of the following print websites:

PrintingForLess.com
PS Print

With any professional print job, it is a good idea to check with your commercial printer for any special requirements.

Graphic Design Resources

View tri-fold templates from StockLayouts.

Learn how to customize templates easily and quickly with Graphic Design Tutorial Videos.

Download the StockLayouts Graphic Design Catalog of professional print layouts to use as a creative resource.

Try a free sample and see how easy templates are to customize!


Filed under: Layout & Editing Tagged: tri fold, tri fold design, tri fold layouts, tri fold mailer, tri fold printing, tri panel brochure

Creating DL Flyers & DL Brochures

$
0
0

DL Flyers, DL Brochures, and DL Pamphlets

Create effective DL flyers quickly and affordably with StockLayouts templates. Customize the designs with your business information for unique promotional materials that sell.

Dimensions of a DL Flyer

The standard dimensions for a dl flyer are 99mm x 210mm, or 1/3 of an A4 paper size. The dimensions are similar to a U.S. size rack card (4″ x 9″).

Inspiration

View the designs below for creative inspiration, or click the image to get a head start on your design project!

Corporate Event Planner

Corporate Event Planner DL Flyer Design

Insurance Agent

Insurance Agent DL Flyer Design

Coffee Shop

Coffee Shop DL Flyer Design

Photography Studio

Photography Studio DL Flyer Design

Farmers Market

Farmers Market DL Flyer Design

Professional Business Marketing Templates

Try DL flyer samples before you buy!

StockLayouts professional designs of DL Flyer templates for creating print marketing materials are available for purchase and download online and are fully customizable in a choice of file formats including QuarkXPress, Adobe InDesign, Adobe Illustrator, CorelDRAW, Microsoft Publisher, Microsoft Word and Apple iWork Pages. Created with high-quality output in mind, the template designs are easy to edit, and suitable for printing in-house on a color printer or on an offset press. The do-it-yourself marketing templates help users promote their business and look more professional with high-impact designs!


Filed under: Layout & Editing, Print Design Ideas Tagged: dl brochures, dl flyers, dl leaflets, dl pamphlets, rack cards

Using StockLayouts Templates with Avery Papers

$
0
0

StockLayouts graphic design templates are formatted using standard measurements for efficient and cost-effective printing. Many of our templates for Microsoft Word are pre-formatted for use with Avery papers. If you are printing your design in-house, use this resource to match StockLayouts designs to the appropriate Avery papers.

Business Cards Set Up for Avery Papers

Business Cards - 10 Up

Business card templates for Microsoft Word are set 10-up on a page.

Compatible Avery templates and paper products: 15871, 18871, 27871, 27881, 27882, 27883, 28371, 28865, 28877, 28878, 38871, 38873, 38876, 5371, 5376, 5377, 55876, 5870, 5871, 5874, 5876, 5877, 5882, 5911, 8371, 8376, 8377, 8471, 8476, 8870, 8871, 8872, 8873, 8874, 8875, 8876, 8877, 8879, 8372, 5872, 5873

View Avery Business Card Paper Products >

Example of StockLayouts Business Card Template set up for Avery papers:

Business Cards - 10 Up

Postcards Set Up for Avery Papers

Avery Postcard Paper 5389

6 x 4 postcard templates for Microsoft Word are centered 2-up on a page.

Compatible Avery templates and paper products: 5389

View Avery Postcard Paper Products >

Example of StockLayouts Postcard Template set up for Avery paper:

6 x 4 Postcards - 2 Up

Tri Fold Brochures Set Up for Avery Papers

Avery Brochure Paper 8324

8.5 x 11 tri-fold brochure templates for Microsoft Word are laid out across three panels (example of outside spread).

Compatible Avery templates and paper products: 5884, 8324, 8384

View Avery Brochure Paper Products >

Example of StockLayouts Brochure Template set up for Avery paper:

8.5 x 11 Tri Fold Brochure - Outside Spread

More Avery Papers that Match StockLayouts Design Templates

View Avery Greeting Card Paper Products >
View StockLayouts Greeting Card Templates >

View Avery Note Card Paper Products >
View StockLayouts Note Card Templates >

Visit Avery for more blank templates.

Professional Business Marketing Templates

Try graphic design templates for free!

StockLayouts professional designs of brochure templates, postcard templates, and business card templates for creating print marketing materials are available for purchase and download online and are fully customizable in a choice of file formats including QuarkXPress, Adobe InDesign, Adobe Illustrator, CorelDRAW, Microsoft Publisher, Microsoft Word and Apple iWork Pages. Created with high-quality output in mind, the template designs are easy to edit, and suitable for printing in-house on a color printer or on an offset press. The do-it-yourself marketing templates help users promote their business and look more professional with high-impact designs!


Filed under: Layout & Editing, Templates Tagged: avery templates, blank templates, desktop printing, Desktop Publishing, Graphic Design

Create an Every Door Direct Mail (EDDM) Postcard

$
0
0

Every Door Direct Mail from the U.S. Postal Service, is a one-stop direct mail resource that offers to help you reach your customers at every home, every address, every time. Create a postcard suitable for the EDDM program quickly and affordably with StockLayouts templates. Customize the design and postcard size to fit your direct mail marketing needs. View an example of a recruiting company postcard that has been transformed into an EDDM mailpiece below!

Original: 5.5 x 8.5 Postcard Design

Recruiting Company Postcard Design

Front: 6.5 x 11 EDDM Postcard Design Sample

USPS EDDM Postcard Design Front

Back: 6.5 x 11 EDDM Postcard Design Sample

USPS EDDM Postcard Design Back

EDDM Postcard Sizes: Acceptable Dimensions for a Flat

EDDM Postcards Sizes

For more requirements, go to usps.com/everydoordirectmail

Professional Business Marketing Templates

Try a do-it-yourself postcard template before you buy!

StockLayouts professional designs of postcard templates for creating print marketing materials are available for purchase and download online and are fully customizable in a choice of file formats including QuarkXPress, Adobe InDesign, Adobe Illustrator, CorelDRAW, Microsoft Publisher, Microsoft Word and Apple iWork Pages. Created with high-quality output in mind, the template designs are easy to edit, and suitable for printing in-house on a color printer or on an offset press. The do-it-yourself marketing templates help users promote their business and look more professional with high-impact designs!


Filed under: Layout & Editing, Print Design Ideas, Templates Tagged: eddm, every door direct mail, marketing, postcard, postcard design, small business

10 Fonts Most Used in StockLayouts Templates

$
0
0

Beyond the classic fonts Helvetica and Garamond, the StockLayouts design team uses certain fonts time and time again in their template layouts. We collect them here in a showcase of our favorite fonts. Put the finishing touches on your next graphic design project with the professional fonts listed below.

Clarendon

Clarendon Font

Eidetic Neo

Eidetic Neo Font

Priori Sans

Priori Font

DIN 1451

DIN 1451 Font

Chalet London 1970

Chalet London 1970 Font

12 Avenir

12 Avenir Font

Houschka Pro

Houschka Pro Font

News Gothic

News Gothic Font

Base Twelve

Base Twelve Font

Trade Gothic

Trade Gothic Font

If you have purchased a StockLayouts design and would like to match the exact look of the layout, click on the icon with the ‘Aa’ on the detail page to view a list of recommended fonts.

Professional Business Marketing Templates

View more font resources for both free and for-purchase fonts.

Try graphic design templates for free!

StockLayouts professional designs of brochure templates, flyer templates, and business card templates for creating print marketing materials are available for purchase and download online and are fully customizable in a choice of file formats including QuarkXPress, Adobe InDesign, Adobe Illustrator, CorelDRAW, Microsoft Publisher, Microsoft Word and Apple iWork Pages. Created with high-quality output in mind, the template designs are easy to edit, and suitable for printing in-house on a color printer or on an offset press. The do-it-yourself marketing templates help users promote their business and look more professional with high-impact designs!


Filed under: Layout & Editing Tagged: 10 best fonts, 10 popular fonts, font list, popular font

Working with Graphics in Microsoft Word

$
0
0

Working with photos and graphics in a Microsoft Word template is easy when you know what to do! Watch the tutorial video below and use the tips in this helpful editing guide to see just how easy it is.

Watch

Insert

To replace a photo, first delete the existing picture from the layout. Then follow the instructions below to insert your own graphic.

  1. On the Insert menu, click on Picture, and then click From File.
  2. Browse to locate the picture you want to insert.
  3. Double-click the picture you want to insert.

You’ll notice that you can’t move the image around the page. This is an easy fix.

  1. Click on the Picture Tools tab.
  2. Under Arrange, select Text Wrapping.
  3. Choose In Front of Text.

We can now freely move the graphic around the page and move it to the desired location.

Arrange

If your photo is overlapping other graphics and text you may want to move it forward or backward.

  1. Select the image.
  2. In the Picture Tools tab select Send to Back.
  3. Use these tools to move graphics forward and backward one position at a time or all the way to the front or back.

Crop

When an image is too big for the space, or not the right shape, you’ll want to crop or scale it. Remember not to distort the image by sizing it up or adjusting from the edges. Scale the graphic down by clicking on a corner and moving your mouse inward towards the center of the image. If you just want to reduce the size on one or more sides, select the crop tool and use the handlebars to make the appropriate adjustment.

Note: Vector artwork can be scaled without loss of picture quality.

Shapes

If you have the need, you can make your photo a circle or other shape. It is possible to do this in Word, but if you have photo editing software it is recommended that you create a clipping path around your photo to accomplish this effect.

  1. On the Insert tab, click on Shapes.
  2. Draw your shape on the page.
  3. Under the Drawing Tools tab, click Fill Shape and choose Picture.
  4. Navigate to the photo you would like to insert into your shape.
  5. Under the Drawing Tools tab, change the shape outline to no outline.

Edit Colors

You can easily change the color of vector graphics or clip art in your layout.

  1. Select the graphic.
  2. Go to the Drawing Tools tab.
  3. Click on Shape Fill and select a color.

Complete the design by customizing the layout with your own colors and message!

Graphic Design Resources

View business marketing templates from StockLayouts.

Learn more about customizing templates with Graphic Design Tutorial Videos.

Try a free sample and see how easy templates are to customize!


Filed under: Layout & Editing, Tutorials, Word & Publisher Tagged: microsoft word, template editing, word templates

Adding Bleed to a Publisher Document for Commercial Printing

$
0
0

You may need to add bleed to your Publisher design in order to print with a commercial printer. Watch the tutorial video below and learn how to add bleed to your template in Microsoft Publisher.

Watch

Guides

You will find this process easier if you turn on your guides. Go to View and select Boundaries and Guides.

Document Size

Go to File > Page Setup and customize your document size to create a guide for the bleed area. You want to add 1/8” (.125″) to each side of the document. For example, if you are working with an 8.5″ x 11″ brochure, your new document size will be 8.75″ x 11.25″.

Adjust graphics

You can now begin creating your bleed. Extend any graphic that touched the edge of the original document to the current page size.

If your graphic is a vector, you can pull the edges out without pixelating the graphic. However if your graphic is a JPG photograph, you cannot stretch the image without distortion. Use the crop tool or use a larger image.

Note: Your fold lines will not change, so only extend the graphics touching the edges.

Finish

Continue adjusting any additional pages. Once you are finished, return the document size to the original page size.

You will see that you now have 1/8” of each graphic extending past the document edge.

Graphic Design Resources

View business marketing templates from StockLayouts.

Learn more about customizing templates with Graphic Design Tutorial Videos.

Try a free sample and see how easy templates are to customize!


Filed under: Layout & Editing, Tutorials, Word & Publisher Tagged: Desktop Publishing, document preparation, microsoft publisher, ms publisher, preparing for print

Save a Marketing Document as a Word Template

$
0
0

Don’t you wish you could open your own letterhead or marketing documents in Word just like it was a pre-designed layout from Microsoft’s free template library? You can! A document saved as a Microsoft Word Template creates a copy of the original with each new use. This makes creating new projects convenient and you’ll never overwrite your original document. In the example below, I will show you how to save a StockLayouts flyer layout as a Word Template for future use.

  1. Open or create your marketing piece.

    Graphic Design Flyer Template
  2. Edit the design to your company’s specifications.

    Edit Template
  3. Click the Microsoft Office Button, and then click Save As > Word Template.

    Edit Template
  4. In the Save As dialog box, do one of the following:
    On a computer that is running Windows Vista, under Favorite Links, click Templates.
    On a computer that is running Windows XP, under Save in, click Trusted Templates.

    Edit Template
  5. Give the new template a file name, select Word Template in the Save as type list, and then click Save.

When you are ready to start a new project with this design:

  1. Click the Microsoft Office Button, and then click New.
  2. In the New Document dialog box click New from Existing under Templates.
  3. Navigate to your design and click Create new.

For more details about saving Microsoft Word Templates visit the Microsoft help guide.

Graphic Design Resources

View business marketing templates from StockLayouts.

Learn more about customizing templates with Graphic Design Tutorial Videos.

Try a free sample and see how easy templates are to customize!


Filed under: Layout & Editing, Tutorials, Word & Publisher Tagged: graphic design templates, marketing, microsoft word, microsoft word templates

How to Resize a Graphic Design Layout

$
0
0

Graphic design templates are a great way to jump start a project! But there is a good chance that you will need to customize the design to suit your needs. Changing colors, replacing photos and entering text is easy, but what if the size of the template isn’t right? Watch the tutorial video below to learn how to adjust an 11 x 17 half-fold brochure into a 8.5 x 11 half-fold brochure.


Graphic Design Resources

View business marketing templates from StockLayouts.

Learn more about customizing templates with Graphic Design Tutorial Videos.

Try a free sample and see how easy templates are to customize!


Filed under: Layout & Editing, Tutorials, Word & Publisher Tagged: graphic design templates, microsoft publisher, template editing

How to Edit a PowerPoint Presentation Template

$
0
0

Create a professional presentation in no time! Start with a PowerPoint template to get your project done long before it’s due. Watch the video below for tips on editing presentation templates.

Watch

Graphic Design Resources

View business marketing templates from StockLayouts.

Learn more about customizing templates with Graphic Design Tutorial Videos.

Try a free presentation template and see how easy they are to customize!


Filed under: Layout & Editing, Microsoft PowerPoint, Presentations, Tutorials Tagged: create presentation, microsoft, powerpoint, presentation, presentation designs, presentation templates

How to Repeat a Logo and Address on Each Page of Your Letterhead in Microsoft Word

$
0
0

You may want your letterhead graphics to display on each page of your letterhead, report, or other document. When you continue to type on to a new page, Word will simply create a blank page. To repeat the graphics on the background of each new page, follow the steps below.

For tips on working with graphics in Word, please watch this tutorial video.

  1. Open or create your marketing piece.

    Graphic Design Flyer Template
  2. Edit the letterhead to your company’s specifications.

    Edit Template
  3. Cut and paste the letterhead graphics to the header.
    1. Select all of the graphics.
    2. Right click on the graphics and navigate to Grouping > Group.
    3. Right click on the graphics and select Cut.
    4. On the Insert tab, select Header.
    5. Insert a Blank header.
    6. Paste the graphics into the document.
    7. Click Close Header and Footer.

    Edit Template

    The graphics will appear grayed out.

    Edit Template

    Your letterhead will now repeat on the background of any new pages added to the document.

    Edit Template

  4. Graphic Design Resources

    View business marketing templates from StockLayouts.

    Learn more about customizing templates with Graphic Design Tutorial Videos.

    Try a free sample and see how easy templates are to customize!


    Filed under: Layout & Editing, Templates Tagged: how to, letterhead, microsoft word, ms word, tutorial

How to Create an 11 x 25.5 Tri-Fold Brochure

$
0
0

11 x 25.5 Tri Fold Graphic Design

Whether you’re starting from scratch or adjusting an existing design, creating an 11 x 25.5″ tri-fold brochure is easy. In this post I will show you how to quickly set up a brochure of this size, or simply edit one that has already been created. For this demonstration, I started with a standard 11 x 17″ bi‑fold brochure template that I got from StockLayouts.com and I reused the graphics to create an 11 x 25.5″ tri-fold brochure. By simply adjusting the width of the document by 8.5″, I created the additional folded panel. Now, I have a third more space in which to promote my product or service. To get started on your design, follow these instructions:

1. Open your brochure file

Open your own 11 x17″ brochure file, or purchase and download a StockLayouts template like the one I’ve used in this example.

Network Administration Brochure Design

2. Adjust your page size.

Change your width to 25.5″. Your page height should already be set to 11″.

3. Lay out your design using the guides below.

Outside (Page 1)

Tri Fold Brochure Outside Layout

Inside (Page 2)

Tri Fold Brochure Inside Layout

4. Save and send to print!

Remember that your home or office printer probably cannot print the required size of paper. Be sure to take your design to your favorite printer for the best results. Also note that, due to Microsoft Word’s limit on page size, you cannot create an 11 x 25.5 brochure in that application. Microsoft Publisher is a great alternative.

Don’t stop at brochures! You can create newsletters, catalogs, menus, reports, and more. And do yourself a favor as I did by using pre-designed layouts, with photos and artwork from graphic design template providers, such as StockLayouts.

Additional Resources

For information about setting up a standard 8.5 x 11″ tri-fold brochure, read our article about tri-fold brochure dimensions.


Filed under: Graphic Design, Layout & Editing, Print Design Ideas Tagged: Bi-fold brochure, big brochure, large brochure, layout, oversized brochure, template editing, three fold brochure, tri fold brochure, two fold brochure

Fill Shapes with Pictures in Microsoft Publisher

$
0
0

When designing a marketing piece, your layout might require an image to be a shape other than a square or rectangle. Publisher makes this easy. You can put images in circles, rectangles with rounded corners, triangles, or any number of shapes available in Publisher. In this tutorial, I will show you how to insert a picture into a triangle shape.

Create a Shape

  1. Click Insert > Shapes, then select a shape.
  2. Draw the shape on the page to the size required.
    Need more help? Add Shapes in Microsoft Publisher

In this example, I will be using a travel postcard template from Stocklayouts. We already have a triangle shape in our layout, so we can begin with changing the shape’s image.

Changing Shape Fill in Postcard


Fill the Shape with an Image

First you will need to size the image properly to match your shape.

  1. Insert the image into the layout. Click Insert > Picture, then select an image.
  2. With the image on top using the shape as a guide, crop the image to match the dimensions of the shape. Crop to the top, bottom, right and left points or to the edges of the shape.
    To crop a picture, select an image, click Picture > Crop
    Need more help? How to Crop a Picture in Microsoft Publisher


Crop the Image to the Shape


Next you will save the cropped image.

  1. Right click on the image and choose ‘Save as Picture’.
  2. Save the image to a location on your computer. The default name will be Picture1.png.
  3. Delete the image from your layout. Next, We will reinsert the saved image from the file into the shape.


Insert a Fill Image


Now you can insert your cropped image into the shape.

  1. Select the shape.
  2. Click Drawing Tools, and then choose Format > Shape Fill > Picture on the Shape Styles section.
  3. Navigate to the location on your computer where you saved Picture1.png.
  4. Select Picture1.png and click Insert.


Shape Filled with Image

Advanced Users: Edit Shape Points

If your shape isn’t exactly the shape you need, you have the option to edit the points.

  1. Select the shape that you want to change.
  2. Click Drawing Tools > Edit Shapes > Edit Points.
  3. Drag one of the vertexes that form it’s outline

Are you using an older version of Publisher? Fill an autoshape with an image in Publisher 2007 or Publisher 2000, 2002 or 2003.

Graphic Design Resources

Make your own postcard with postcard templates from StockLayouts.

Get Publisher postcard templates from LayoutReady.com – templates for Microsoft Word and Publisher.

Learn how to customize templates quickly and easily with helpful tutorial videos.

Download the StockLayouts Graphic Design Catalog of professional print layouts to use as a creative resource.

Try a free sample template from StockLayouts.


Filed under: Layout & Editing, Microsoft Word & Publisher Tagged: editing in publisher, microsoft publisher, template tutorial, tutorial

Powerful PowerPoint Presentations for Business

$
0
0

Business Marketing Templates – Speech Therapy Education

We’ve added new presentations to our template library. Select from a wide variety of designs to create captivating presentations in Microsoft PowerPoint. View more presentations >

Human Resource Management Presentation Example

PowerPoint Sample - Human Resource Management

Management Consulting Presentation Example

PowerPoint Sample - Management Consulting

Marketing Consultant Presentation Example

PowerPoint Sample - Marketing Consultant

Coffee Shop Presentation Example

PowerPoint Sample - Coffee Shop

Professional Business Marketing Templates

View more Microsoft PowerPoint templates for business presentations from StockLayouts.

StockLayouts professional design layouts of presentations are available for purchase and download online and are fully customizable in Microsoft PowerPoint. The do-it-yourself PowerPoint templates help users promote their business and look more professional with powerful, high-impact designs!


Filed under: Graphic Design, Microsoft PowerPoint, Presentations Tagged: business presentations, creative presentations, presentation designs, presentation ideas, presentations examples

How to Convert an 11 x 17 Print Layout PDF to Single 8.5 x 11 Pages

$
0
0

11x17 Newsletter Design Print Layout
Businesses often need to send or post their completed newsletter or brochure online. The easiest and most practical format for distributing a document is the PDF. The PDF is superior to other formats because everyone has access to it, your document maintains its format, and you can secure the document from being edited. 8.5x11 4-Page Newsletter Layout PDF 
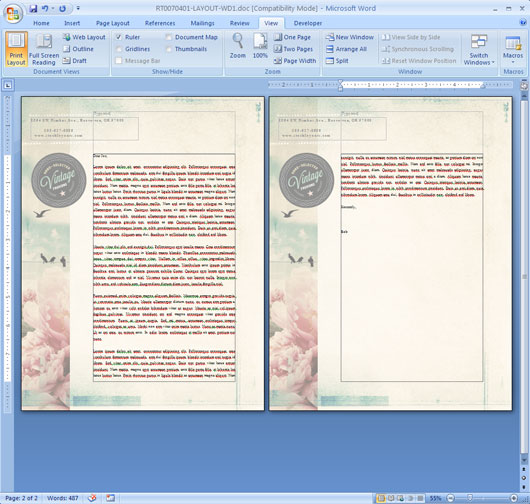
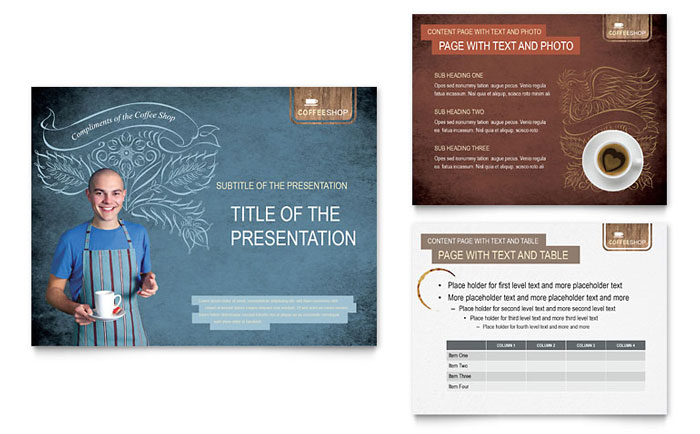
However, if your document is an 11 x 17″ spread designed for print, you will need to divide the document into single 8.5 x 11″ consecutive pages in order to make it view and read correctly.

There are two methods for dividing your print layout: by cropping your PDF after it has been created, or by manually dividing the content on each 11 x 17″ spread and cutting and pasting the elements into a new 8.5 x 11″ document. The second option may require quite a bit of additional editing.

Method 1:
Create and crop a PDF in Adobe Acrobat

The fastest way to separate your layout into individual pages, while maintaining the design integrity, is to create a PDF of the document and crop it using Adobe Acrobat. If your text crosses the fold line, you might want to rearrange those elements before creating your PDF.

First create a PDF of your 11 x 17″ document, then follow these steps: Show Page Thumbnails in Acrobat

  1. Open your PDF in Adobe Acrobat.
  2. To show the Page Thumbnails panel, click on the Page Thumbnail icon at the top left.
  3. Copy each spread in the Page Thumbnails panel, so you have two of each page.
    Tip: To copy a page, hold the Ctrl key while dragging the page thumbnail below the selected page.
  4. On the first spread, right click on the Page Thumbnail and choose Crop Pages. Crop Pages Selection in Acrobat
  5. Under margin controls, enter 8.5 into the box for the left margin. Click Ok. Crop 11x17 Page PDF in Adobe Acrobat
  6. On spread 2, enter 8.5 into the box for the right margin. Click Ok.
  7. On spread 3, enter 8.5 into the box for the right margin. Click Ok.
  8. On spread 4, enter 8.5 into the box for the left margin. Click Ok.
  9. Move the Page Thumbnails as needed to put the pages in their correct order.
  10. Finally, save your new 8.5 x 11″ document as a PDF.

Cropped 8.5x11 Single Pages in Adobe Acrobat

The newsletter design template used in this tutorial may be purchased at StockLayouts.

Method 2:
Manually cut and paste the layout text and graphics into a new document

If you do not have Adobe Acrobat, you can still manually divide the content from the 11 x 17″ document into single 8.5 x 11″ consecutive pages. You may have to readjust text or graphics to fit the smaller page size.

  1. Open your existing 11 x 17″ document.
  2. Create a new 8.5 x 11″ blank document with four pages.
  3. Select the individual text and graphic objects from the right half of your first spread.
  4. Group the objects.
    Tip: For help selecting and grouping objects in Microsoft Word and Publisher, visit StockLayouts Guide for editing Word and Publisher documents.
  5. Copy and paste into the first page of the blank document you created.
  6. Repeat the steps to place the remaining items into the appropriate blank pages.
  7. Create a PDF when you are finished.

Filed under: Layout & Editing, Tutorials Tagged: acrobat, adobe acrobat, create pdf, crop pdf, page layout

What Are the Dimensions of a Tri Fold Brochure?

$
0
0

Tri Fold Brochure

Tri-fold brochures are one of the most commonly used marketing materials, but can be one of the most challenging to design. There are many details to consider when laying out a tri-fold brochure, including paper size, fold lines, content layout, and file preparation. This article serves as your guide for setting up a tri-fold brochure for professional printing.

Paper size

The possibilities are endless when it comes to choosing the size of your brochure. There are no limits to your creativity, nor should there be in your design. However, if you want to create something easy to design and print, you may want to stick with one of the standard sizes below. Throughout the rest of this post I will focus on the most common brochure size, the 8.5″ x 11″ tri‑fold.

8.5″ x 11″ (Letter)

The standard ‘tri-fold’ is actually three panels with only two fold lines. It can be handed out, placed in a brochure rack, or easily mailed. This size is also often used for take-out menus.

8.5″ x 14″ (Legal)

Legal size tri-folds are not as common, but are still used today. With three extra inches of total length, each of your panels will allow a bit more space for content.

11″ x 17″ (Tabloid)

Although frequently used as a half-fold brochure or menu, this paper size can also be used as a tri-fold.

11″ x 25.5″

The much larger 11″ x 25.5″ brochure is comprised of three 8.5″ x 11″ panels, and is used for lengthy, more robust brochures.

Fold Lines

Novice designers assume that a tri-fold brochure folds into three equal parts, but this is not the case. A little extra room is required to account for the thickness of the paper in the fold. While creating a design with three slightly unequal panels isn’t the end of the world, your result will be more professional if you make this adjustment. Below are the correct fold lines for an 8.5″ x 11″ tri‑fold brochure or pamphlet:

Tri Fold Brochure Dimensions

Outside: 3.625″ & 7.313″, creating 3.625″, 3.688″, 3.688″ panels.

Inside: 3.688″ & 7.376″, creating 3.688″, 3.688″, 3.625″ panels.

Layout

Outside Spread

The outside spread of your layout consists of the top of your inside flap, back cover, and the front cover. Please note that the graphics on each panel will stand alone when the brochure is folded. This doesn’t mean you can’t design across the panels, but double check that each panel looks good on its own.

Tri Fold Brochure Outside Spread Fold Lines

Inside Spread

The inside spread lays flat when opened and the design does not necessarily have to be compartmentalized into panels. Your design will look more fluid if you design across the page.

Tri Fold Brochure Inside Spread Fold Lines

Print ready

For optimal print results, it is important to make your file print-ready. Most printers require full bleeds in a design. The graphics in your design should extend .25″ beyond the paper size (.125″ on each side). Also be sure to lay out text and important graphics within the safe zone, a .125″ area within the paper size. You can print your design on any stock paper of your choosing, but brochures are generally printed on 80 to 100 lb. stock. Ask your printer for their recommendation if necessary.

For help with adding bleeds to a Publisher document, please visit How to Set-up Bleeds on a Microsoft Publisher Document for Professional Printing. Note: It is not recommended you attempt to add bleeds to a Microsoft Word design.

For blank templates and more details on setting up your file for print, visit one of the following print websites:

PrintingForLess.com
PS Print

With any professional print job, it is a good idea to check with your commercial printer for any special requirements.

Graphic Design Resources

Make your own tri-fold brochure with tri-fold templates from StockLayouts.

Get Word tri-fold brochure templates from LayoutReady.com – templates for Microsoft Word and Publisher.

Download the StockLayouts Graphic Design Catalog of professional print layouts to use as a creative resource.

Try a free tri-fold brochure template and see how easy it is to customize StockLayouts’ designs!


Filed under: Brochures, Graphic Design, Layout & Editing, Resources Tagged: business brochures, tri fold, tri fold brochure, tri fold design, tri fold layout, tri fold mailer, tri fold printing, tri panel brochure
Viewing all 37 articles
Browse latest View live