Don’t you wish you could open your own letterhead or marketing documents in Word just like it was a pre-designed layout from Microsoft’s free template library? You can! A document saved as a Microsoft Word Template creates a copy of the original with each new use. This makes creating new projects convenient and you’ll never overwrite your original document. In the example below, I will show you how to save a StockLayouts flyer layout as a Word Template for future use.
1. Open or create your marketing piece.
2. Edit the design to your company’s specifications.
3. Click the Microsoft Office Button, and then click Save As > Word Template.
4. In the Save As dialog box, do one of the following:
On a computer that is running Windows Vista, under Favorite Links, click Templates.
On a computer that is running Windows XP, under Save in, click Trusted Templates.
5. Give the new template a file name, select Word Template in the Save as type list, and then click Save.
When you are ready to start a new project with this design:
Click the Microsoft Office Button, and then click New.
In the New Document dialog box click New from Existing under Templates.
Navigate to your design and click Create new.
For more details about saving Microsoft Word Templates visit the Microsoft help guide.
Graphic design templates are a great way to jump start a project. But there is a good chance that you will need to customize the design to suit your needs. Changing colors, replacing photos and entering text is easy, but what if the size of the template isn’t right? Watch the tutorial video below to learn how to adjust an 11 x 17 half-fold brochure into a 8.5 x 11 half-fold brochure.
Create a professional presentation in no time. Start with a Microsoft PowerPoint template to get your project done long before it’s due. Watch the video below for tips on editing PowerPoint presentations.
You may want your letterhead graphics to display on each page of your letterhead, report, or other document. When you continue to type on to a new page, Word will simply create a blank page. To repeat the graphics on the background of each new page, follow the steps below.
StockLayouts graphic design templates are formatted using standard measurements for efficient and cost-effective printing. Many of our templates for Microsoft Word are pre-formatted for use with Avery papers. If you are printing your design in-house, use this resource to match StockLayouts designs to the appropriate Avery papers.
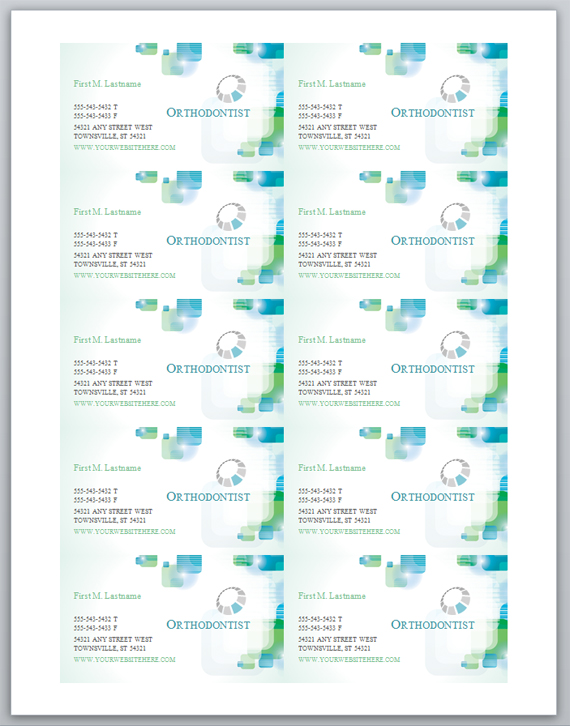
Business Cards Set Up for Avery Papers
Business card templates for Microsoft Word are set 10-up on a page.
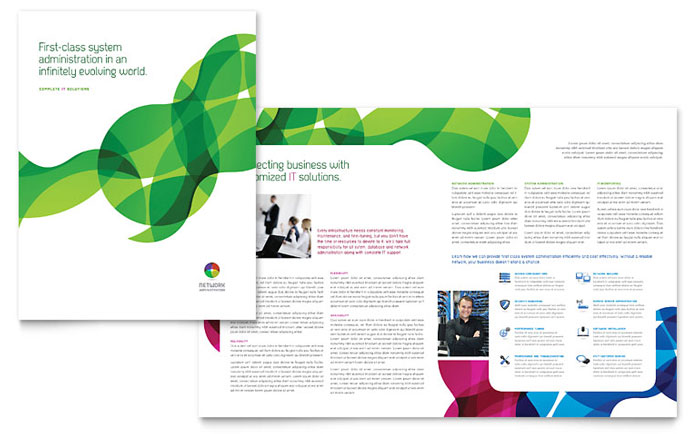
StockLayouts professional designs of brochure templates, postcard templates, and business card templates for creating print marketing materials are available for purchase and download online and are fully customizable in a choice of file formats including QuarkXPress, Adobe InDesign, Adobe Illustrator, CorelDRAW, Microsoft Publisher, Microsoft Word and Apple iWork Pages. Created with high-quality output in mind, the template designs are easy to edit, and suitable for printing in-house on a color printer or on an offset press. The do-it-yourself marketing templates help users promote their business and look more professional with high-impact designs!
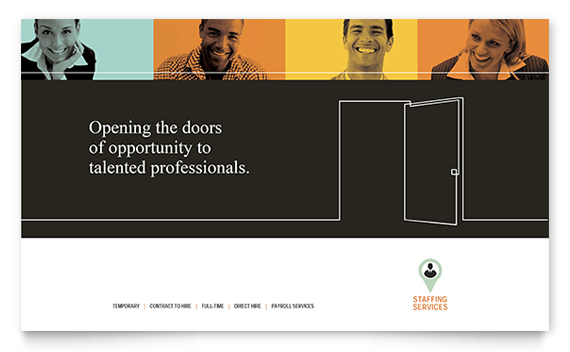
Every Door Direct Mail from the U.S. Postal Service, is a one-stop direct mail resource that offers to help you reach your customers at every home, every address, every time. Create a postcard suitable for the EDDM program quickly and affordably with StockLayouts templates. Customize the design and postcard size to fit your direct mail marketing needs. View an example of a recruiting company postcard that has been transformed into an EDDM mailpiece below.
Original: 5.5 x 8.5 Postcard Design
Front: 6.5 x 11 EDDM Postcard Design
Back: 6.5 x 11 EDDM Postcard Design
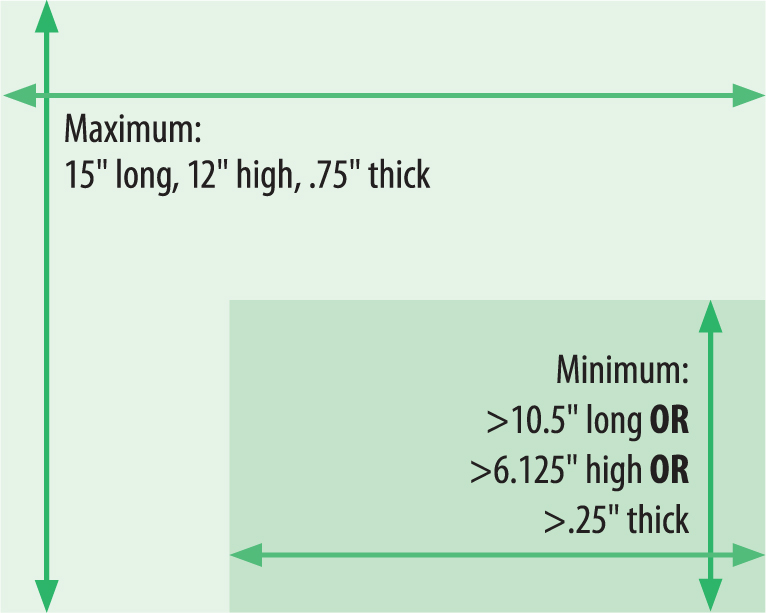
EDDM Postcard Sizes: Acceptable Dimensions for a Flat Mail Piece
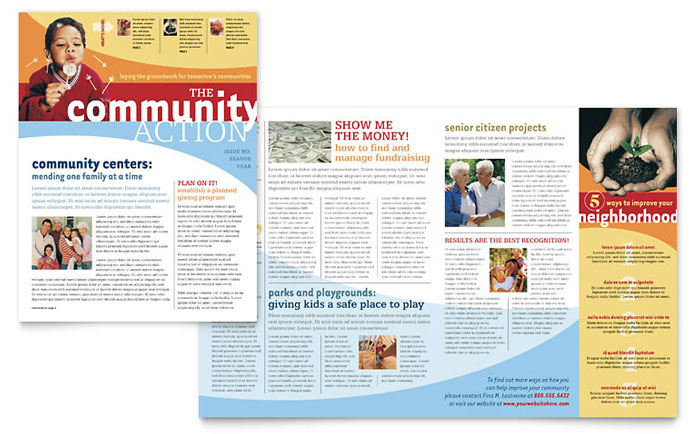
StockLayouts professional designs for creating print marketing materials are available for purchase and download online and are fully customizable in a choice of file formats including QuarkXPress, Adobe InDesign, Adobe Illustrator, CorelDRAW, Microsoft Publisher, Microsoft Word and Apple iWork Pages. Created with high-quality output in mind, the template designs are easy to edit, and suitable for printing in-house on a color printer or on an offset press. The do-it-yourself marketing templates help users promote their business and look more professional with high-impact designs.
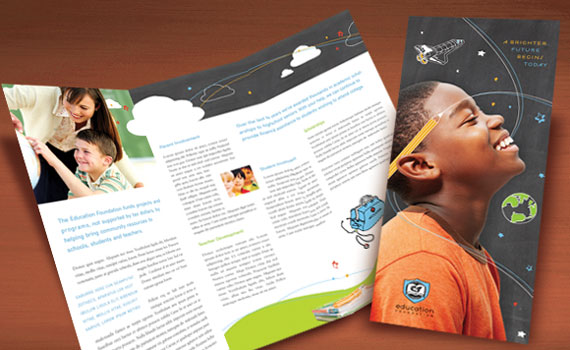
Whether you’re starting from scratch or adjusting an existing design, creating an 11 x 25.5″ tri-fold brochure is easy. In this post I will show you how to quickly set up a brochure of this size, or simply edit one that has already been created. For this demonstration, I started with a standard 11 x 17″ bi‑fold brochure template that I got from StockLayouts.com and I reused the graphics to create an 11 x 25.5″ tri-fold brochure. By simply adjusting the width of the document by 8.5″, I created the additional folded panel. Now, I have a third more space in which to promote my product or service. To get started on your design, follow these instructions:
1. Open your brochure file
Open your own 11 x 17″ brochure file, or purchase and download a StockLayouts template like the one I’ve used in this example.
2. Adjust your page size.
Change your width to 25.5″. Your page height should already be set to 11″.
3. Lay out your design using the guides below.
Outside (Page 1)
Inside (Page 2)
4. Save and send to print.
Remember that your home or office printer probably cannot print the required size of paper. Be sure to take your design to your favorite printer for the best results. Also note that, due to Microsoft Word’s limit on page size, you cannot create an 11 x 25.5″ brochure in that application. Microsoft Publisher is a great alternative.
Don’t stop at brochures. You can create newsletters, catalogs, menus, reports, and more. And do yourself a favor as I did by using pre-designed layouts, with photos and artwork from graphic design template providers, such as StockLayouts.
Additional Resources
For information about setting up a standard 8.5 x 11″ tri-fold brochure, read our article about tri-fold brochure dimensions.
When designing a marketing piece, your layout might require an image to be a shape other than a square or rectangle. Publisher makes this easy. You can put images in circles, rectangles with rounded corners, triangles, or any number of shapes available in Publisher. In this tutorial, I will show you how to insert a picture into a triangle shape.
In this example, I will be using a travel postcard template from Stocklayouts. We already have a triangle shape in our layout, so we can begin with changing the shape’s image.
Fill the Shape with an Image
First you will need to size the image properly to match your shape.
Insert the image into the layout. Click Insert > Picture, then select an image.
With the image on top using the shape as a guide, crop the image to match the dimensions of the shape. Crop to the top, bottom, right and left points or to the edges of the shape.
To crop a picture, select an image, click Picture > Crop Need more help?How to Crop a Picture in Microsoft Publisher
Next you will save the cropped image.
Right click on the image and choose ‘Save as Picture’.
Save the image to a location on your computer. The default name will be Picture1.png.
Delete the image from your layout. Next, We will reinsert the saved image from the file into the shape.
Now you can insert your cropped image into the shape.
Select the shape.
Click Drawing Tools, and then choose Format > Shape Fill > Picture on the Shape Styles section.
Navigate to the location on your computer where you saved Picture1.png.
Select Picture1.png and click Insert.
Advanced Users: Edit Shape Points
If your shape isn’t exactly the shape you need, you have the option to edit the points.
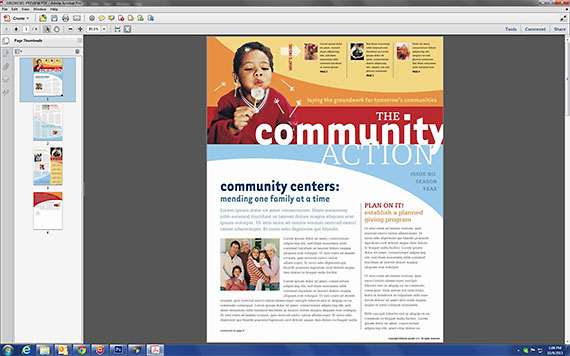
Businesses often need to send or post their completed newsletter or brochure online. The easiest and most practical format for distributing a document is the PDF. The PDF is superior to other formats because everyone has access to it, your document maintains its format, and you can secure the document from being edited. However, if your document is an 11 x 17″ spread designed for print, you will need to divide the document into single 8.5 x 11″ consecutive pages in order to make it view and read correctly.
There are two methods for dividing your print layout: by cropping your PDF after it has been created, or by manually dividing the content on each 11 x 17″ spread and cutting and pasting the elements into a new 8.5 x 11″ document. The second option may require quite a bit of additional editing.
Method 1:
Create and crop a PDF in Adobe Acrobat
The fastest way to separate your layout into individual pages, while maintaining the design integrity, is to create a PDF of the document and crop it using Adobe Acrobat. If your text crosses the fold line, you might want to rearrange those elements before creating your PDF.
First create a PDF of your 11 x 17″ document, then follow these steps:
Open your PDF in Adobe Acrobat.
To show the Page Thumbnails panel, click on the Page Thumbnail icon at the top left.
Copy each spread in the Page Thumbnails panel, so you have two of each page. Tip: To copy a page, hold the Ctrl key while dragging the page thumbnail below the selected page.
On the first spread, right click on the Page Thumbnail and choose Crop Pages.
Under margin controls, enter 8.5 into the box for the left margin. Click Ok.
On spread 2, enter 8.5 into the box for the right margin. Click Ok.
On spread 3, enter 8.5 into the box for the right margin. Click Ok.
On spread 4, enter 8.5 into the box for the left margin. Click Ok.
Move the Page Thumbnails as needed to put the pages in their correct order.
Finally, save your new 8.5 x 11″ document as a PDF.
Method 2:
Manually cut and paste the layout text and graphics into a new document
If you do not have Adobe Acrobat, you can still manually divide the content from the 11 x 17″ document into single 8.5 x 11″ consecutive pages. You may have to readjust text or graphics to fit the smaller page size.
Open your existing 11 x 17″ document.
Create a new 8.5 x 11″ blank document with four pages.
Select the individual text and graphic objects from the right half of your first spread.
Tri-fold brochures are one of the most commonly used marketing materials, but can be one of the most challenging to design. There are many details to consider when laying out a tri-fold brochure, including paper size, fold lines, content layout, and file preparation. This article serves as your guide for setting up a tri-fold brochure for professional printing.
Paper size
The possibilities are endless when it comes to choosing the size of your brochure. There are no limits to your creativity, nor should there be in your design. However, if you want to create something easy to design and print, you may want to stick with one of the standard sizes below. Throughout the rest of this post I will focus on the most common brochure size, the 8.5″ x 11″ tri‑fold.
8.5″ x 11″ (Letter)
The standard ‘tri-fold’ is actually three panels with only two fold lines. It can be handed out, placed in a brochure rack, or easily mailed. This size is also often used for take-out menus.
8.5″ x 14″ (Legal)
Legal size tri-folds are not as common, but are still used today. With three extra inches of total length, each of your panels will allow a bit more space for content.
11″ x 17″ (Tabloid)
Although frequently used as a half-fold brochure or menu, this paper size can also be used as a tri-fold.
11″ x 25.5″
The much larger 11″ x 25.5″ brochure is comprised of three 8.5″ x 11″ panels, and is used for lengthy, more robust brochures.
Fold Lines
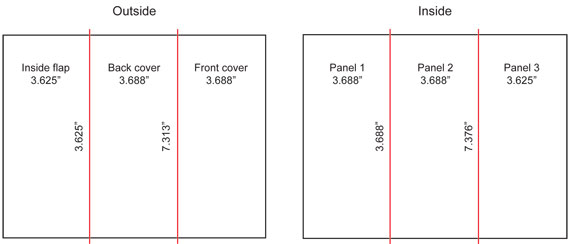
Novice designers assume that a tri-fold brochure folds into three equal parts, but this is not the case. A little extra room is required to account for the thickness of the paper in the fold. While creating a design with three slightly unequal panels isn’t the end of the world, your result will be more professional if you make this adjustment. Below are the correct fold lines for an 8.5″ x 11″ tri‑fold brochure or pamphlet:
The outside spread of your layout consists of the top of your inside flap, back cover, and the front cover. Please note that the graphics on each panel will stand alone when the brochure is folded. This doesn’t mean you can’t design across the panels, but double check that each panel looks good on its own.
Inside Spread
The inside spread lays flat when opened and the design does not necessarily have to be compartmentalized into panels. Your design will look more fluid if you design across the page.
Print ready
For optimal print results, it is important to make your file print-ready. Most printers require full bleeds in a design. The graphics in your design should extend .25″ beyond the paper size (.125″ on each side). Also be sure to lay out text and important graphics within the safe zone, a .125″ area within the paper size. You can print your design on any stock paper of your choosing, but brochures are generally printed on 80 to 100 lb. stock. Ask your printer for their recommendation if necessary.
Editing graphic design templates from StockLayouts.com is quick and easy. Add or replace pictures, change colors, move, scale and crop graphic elements, change the fonts and replace the filler text with your own copy to create a customized marketing piece. Watch the video below to see just how easy it is to edit pre-designed layouts in Microsoft Publisher.
Working with pictures and graphics in Microsoft Word is easy when you know what to do. Use the tips in this helpful editing guide and watch the tutorial video below to see just how easy it is.
Insert a Picture or Logo
On the Insert menu, click on Picture, and then click From File.
Browse to locate the picture you want to insert.
Double-click the picture you want to insert.
Move a Picture or Graphic Anywhere on a Page
You may notice that you can’t move an inserted picture or graphic freely around on the page. This is an easy fix:
Click on the Picture Tools tab.
Under Arrange, select Text Wrapping.
Choose In Front of Text.
Now, you can freely move the graphic around the page and move it to the desired location.
Move a Picture or Graphic Forward or Backward
If your photo or clip art is overlapping other graphics and text, you may want to move it forward or backward.
Select the image.
In the Picture Tools tab select Send to Back.
Use these tools to move graphics forward and backward one position at a time, or all the way to the front or back.
Resize or Crop a Picture
When an image is too big for the space, or not the right shape, you’ll want to crop or scale it. Remember not to distort the image by sizing it up or adjusting from the edges. Scale the graphic down by clicking on a corner and moving your mouse inward towards the center of the image. If you just want to reduce the size on one or more sides, select the crop tool and use the handlebars to make the appropriate adjustment.
To Resize:
Click the picture or shape you want to resize.
Drag a sizing handle away from or toward the center.
To Crop:
Select the picture that you want to crop.
Under Picture Tools, on the Format tab, in the Size group, click Crop.
Drag the cropping handles on that side or corner you want to adjust.
Note: Vector artwork can be scaled without loss of picture quality.
Make a Picture into a Shape
If you have the need, you can make your photo a circle or other shape.
On the Insert tab, click on Shapes.
Draw your shape on the page.
Under the Drawing Tools tab, click Fill Shape and choose Picture.
Navigate to the photo you would like to insert into your shape.
Under the Drawing Tools tab, change the shape outline to no outline.
Edit the Color of a Shape or Clip Art
You can easily change the color of vector graphics or clip art in your layout.
Select the graphic.
Go to the Drawing Tools tab.
Click on Shape Fill and select a color.
Watch the Video to See These Useful Tips in Action
If you have an 11 x 17″ Word document that is larger than your office printer can print, you might want to reduce or scale it to print on an 8.5 x 11″ paper size. There are two ways you can reduce a Word document to fit on a smaller paper size. You can ‘Scale to Paper Size’ directly in Microsoft Word or, for more print sizing control, you can create a PDF in Word and then choose from many print options available in Adobe Acrobat Reader.
Option 1: Export Word document to PDF and print using Acrobat Reader
Requirements: Microsoft Word, Adobe Acrobat Reader Acrobat Reader offers more choices for Page Sizing than Microsoft Word for printing documents. You’ll need Adobe Acrobat Reader, in addition to Microsoft Word, to create and print your PDF document. You can download Acrobat Reader for free from Adobe if you don’t already have it on your system. First, you’ll open your document in Microsoft Word and export it as a PDF. Then, you’ll open the PDF file in Acrobat Reader and select options to print.
Open your document in Microsoft Word
Select File > Export.
Choose Create PDF/XPS Document and click the Create PDF/XPS button
Save the file on your computer.
Now, open the exported PDF file in Adobe Acrobat Reader.
Select File > Print
Under Page Sizing & Handling, you can choose from several options. The “Fit” option shrinks the entire page to fit to the defined Page Setup. The “Custom Scale” option allows you to enter an exact percentage. For example, 78% will reduce an 11 x 17″ document to fit the width of an 8.5 x 11″ page, trimming the top and bottom of the document when it’s printed. Likewise, 63% will reduce an 11 x 17″ document to fit the height of an 8.5 x 11″ page, leaving white space on the left and right side of document when it’s printed. The preview window shows the original size of the document and the area that will be printed on the page.
Option 2: Scale to paper size and print using Microsoft Word
Requirements:Microsoft Word To print an 11 x 17″ Word document to fit on an 8.5 x 11″ page, you can print and scale to paper size directly in Word.
Open document in Microsoft Word
Select File > Print > Choose 1 Page Per Sheet > Scale to Paper Size > Select Letter 8.5 x 11″.
This will scale the entire document, regardless of its original size, to fit on an 8.5 x 11″ page when it’s printed. Unlike the option to print a PDF from Acrobat Reader, you do not have the choice to set specific percentages for scaling in Microsoft Word.
Need to create posters or flyers? Get a head start with graphic design templates from StockLayouts. Choose from thousands of pre-designed Word templates for creating a variety of business marketing materials. Remember, you can scale any size Word document to print on the paper size you want.
If you would like to create your own printed business cards, you can do it yourself with Avery business card papers, computer software, and a printer. Start with a blank template or a pre-made design in Microsoft Word or download templates from the Avery website. You can also find hundreds of unique, professionally designed templates for purchase (and a couple for free) on LayoutReady.com. The business card templates are available in Microsoft Word and Microsoft Publisher file formats and are set up 10 per page, ready to use with Avery papers. In this post, you’ll find links to free templates and resources, business card design examples, and where to purchase Avery paper. With these tools, you’ll be able to easily create great looking business cards.
Free Avery Business Card Templates: How To Download and Customize LayoutReady Templates in Microsoft Word for Printing on Avery Papers
Create an account on LayoutReady.com to download the free business card templates for Microsoft Word, which are compatible with Avery papers. Here are the steps:
Click on one of the links below to download a free business card template.
After you create an account, select the file format: Word / U.S. Size, then click the download button.
Extract the compressed folder. Right-click on the downloaded file and select Extract All.
The folder includes three layout files: letterhead, business card, and envelope. The second layout file is the business card file.
Open the file in Microsoft Word and customize it to your needs. Change the text, fonts, colors, or the logo artwork.
Once you are finished designing your business cards, save the file and print it on your Avery paper.
Business Card Design Examples Compatible With Avery Papers
LayoutReady offers a large selection of printable business card templates in a wide variety of styles and themes, which can be downloaded from their website in Microsoft Word or Publisher file formats. Here is a small selection of their design templates that work with Avery papers.
Check these websites for more templates designed to work with Avery papers.
Avery: Avery offers the ability to create your own business cards using their online design tool. They will also print them for you.
Microsoft Office: Microsoft offers a variety of pre-made templates within their software applications. Simply choose a business card template when creating a new document.
StockLayouts: StockLayouts offers design templates in a variety of file formats including Adobe InDesign, Illustrator, Microsoft Word, Publisher, Apple Pages, QuarkXPress and CorelDraw. Only the business card templates for Microsoft Word, Publisher and Apple Pages are set up 10 per page, ready to use with Avery papers.
Avery Business Card Paper 8371 and 5371
The most commonly used Avery papers for business cards are products 8371 (Inkjet paper) and 5371 (Laser paper). They are made of heavyweight 80lb. cover stock with a matte finish. They are micro-perforated for easy separation after printing. You can purchase Avery papers online at Avery.com or Amazon.com, and at many retail stores such as Office Depot.
Avery Templates and Papers for Other Print Projects
Avery offers a variety of templates and paper products that you can use to create other print projects. Here are some of the different products:
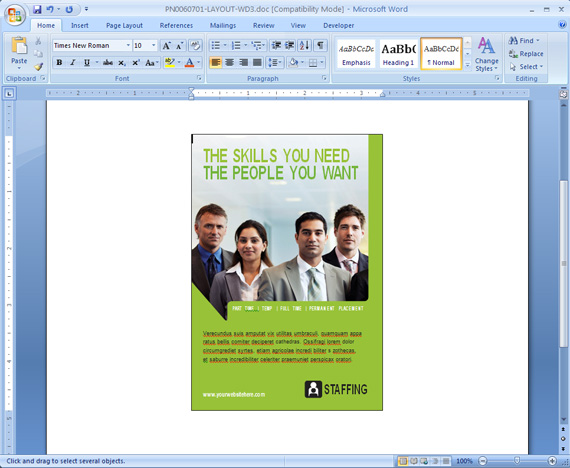
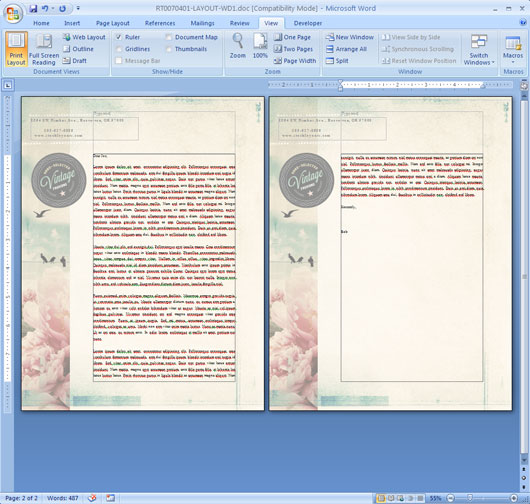
If you downloaded a Word document and can’t edit the file when opened, it may look like the screen shot below. If so, you’ll need to change the editing mode from Viewing to Editing. However, if the document was downloaded as a zipped file, you will need to extract the files first. This article will show you a couple of ways to successfully enable editing of your downloaded file.
Option 1: Extract Zip file before opening document
Locate the zipped file or folder that you want to unzip (extract). If you downloaded the file from a website, it is probably in your Downloads folder on your computer.
Right-click on the zipped file, select Extract All and select a location on your computer where you would like to save the files.
Navigate to where you saved the extracted files. Then, open the Word document and click on Enable Editing.
Now, the document is fully editable. Notice it has changed from Viewing mode to Editing mode.
Option 2: Save Word document as a copy before editing
Open the Word document and click on Enable Editing at the top of the screen.
Select File > Save As and follow the instructions to save the file to a new location on your computer. This unzips the file while saving it to the new location.
Now, the document is fully editable.
More Articles About Editing and Viewing Modes in Microsoft Word
There may be other reasons why you cannot edit your Word document. For example, someone might have restricted the document for editing. Refer to these articles on the Microsoft website for more help:
Once you have your Word document open for editing, you may need a little extra help formatting. If this is the case, StockLayouts offers a simple document editing guide for Word that covers many of the formatting, layout, and design features available in Microsoft Word.
The document layout used in this article is one of thousands of beautifully designed Word templates available on the StockLayouts website. To find this design and many others, visit StockLayouts.com
You can create your own marketing materials in minutes using premade design templates in Microsoft Word. For example, it’s quick and easy to make brochures, flyers, posters, and business cards, when most of the design work is already done. All you have to do is tweak the layout and graphics to fit your brand by adding your own logo and text and changing colors and pictures.
Follow these simple steps to quickly create a design project using Microsoft Word. First, we’ll explain ways you can customize a design template to make a unique and branded design piece. Second, we’ll provide you with specific editing tips you’ll need to know to be successful formatting documents in Microsoft Word.
The easiest way to get started is to use a predesigned template. You can find free templates within Microsoft Word and on the Microsoft Office website. In addition, you can find thousands of free and premium Word templates on websites such as StockLayouts.com, Envato.com, CreativeMarket.com, Template.net, and Freepik.com. Browse these collections to find the perfect template to start your project.
Once you have selected a template to work with, you can begin customizing it by changing the pictures and adding your own logo. Some template providers, such as StockLayouts, include high quality stock photos that are free to use or you can replace them with your own. Add your logo to the layout to reinforce your brand identity.
Step 3. Choose Colors That Suit Your Brand
Now, you can change the colors in the layout to your desired color palette to match other marketing materials and your online presence. Make sure your colors complement each other to evoke just the right feeling you want to project for your business.
Step 4. Add Your Own Text and Pick Fonts
The next step will be to insert your own copy into the layout. The template will help guide you where to place the text and where you should insert headlines and a call to action as well as contact information. After you have placed your copy, try selecting different fonts to stylize the text and bring your message to life.
Step 5. Print In-House or Send It Out
When your design is complete, you’re ready to print it or distribute it as a digital file. You can print your project on your own printer or send the file out for professional printing. You can also make a PDF of the file to easily distribute the document online.
Instructions for Editing a Template in Microsoft Word
The following editing tips will help you make the changes to your Word template quickly and easily. In no time, you’ll be designing like a professional.
Contents
To get step-by-step instructions on the topic of your choice, click one of the links below:
Using text boxes in Word enables you to create text containers that can be easily moved around on the page and formatted just the way you like. You can even layer text boxes on top of one another to achieve artistic results. Follow the instructions below to edit text boxes.
Replacing placeholder text
Click on the text box, select the placeholder text within it and replace it with your own. Resize the text box as needed to accommodate your copy.
Inserting a new text box
On the Insert tab, in the Text group, click Text Box, and then select click Draw Text Box
Drag to draw the text box the size that you want.
To add text, click inside the box and type or your paste text.
Changing the wrapping style of a text box
Change the wrapping style of a text box to freely place it on the page and to layer it in front of or behind others.
Select the text box you want to change.
On the Format tab, in the Arrange group, click Wrap Text, and then select In Front of Text.
Move the text box where you want. To move a text box, click on the edge of the box and drag.
Change the wrapping style of a text box
Moving a text box forward or backward
Layer text boxes on top of one another to create special effects.
Select the text box you want to move forward or backward.
On the Format tab, in the Arrange group, select Bring Forward, Send Backward, Bring to Front, or Send to Back.
Move a text box forward or backward
How To Change Font, Size and Style of Text
Applying a different font to text
Select the text you want to change.
On the Home tab, in the Font group, select a font name in the Font box.
Changing the size of text
Select the text you want to change.
On the Home tab, in the Font group, type or select a point size in the Font Size box. For example, type 10.5.
Increasing or decreasing space between characters
Select the text you want to change.
On the Home tab, in the Font group, click the Font Dialog Box Launcher, and then click the Advanced tab.
In the Spacing box, enter the value you want.
Change font, size and style of text
Changing the color of text
Select the text you want to change.
On the Home tab, in the Font group, click the arrow next to Font Color, and then select the color that you want.
Condensing or expanding text
Select the text you want to change.
On the Home tab, in the Font group, click the Font Dialog Box Launcher, and then click the Advanced tab.
In the Scale box, enter the percentage you want.
How To Add Your Own Pictures and Logo
Replacing an existing picture in the template
Click on the picture you want to replace in the template.
On the Picture Tools, Format tab, click Change Picture.
Browse to locate the picture you want to insert.
Double-click the picture that you want to insert. Note: You may need to resize or crop the new picture to fit the space.
Inserting a new picture from a file
Click where you want to insert the picture in your document.
On the Insert tab, in the Illustrations group, click Picture.
Browse to locate the picture you want to insert. For example, you might have a picture file located in your Documents or Pictures folder on your computer.
Double-click the picture that you want to insert. Note: In Word, pictures are inserted at the top left corner of the page. The picture may be hidden behind another graphic. To select the picture, move graphics on top out of the way and change its wrapping style.
Changing the wrapping style of a picture
Change the wrapping style of a picture to freely place it on the page and to layer it in front or behind others.
Select the picture you want to change.
On the Format tab, in the Arrange group, click Wrap Text, and then select In Front of Text.
Move the picture where you want.
Change the wrapping style of a picture
Selecting graphics placed behind other graphics
Pictures and graphics may be layered on top of one another in the document. Click the graphic on top and drag it out of the way to select the graphic behind or change the layer order of the graphic by moving it forward or backward.
Moving a graphic forward or backward
Select the graphic you want to move forward or backward.
On the Format tab, in the Arrange group, select Bring Forward, Send Backward, Bring to Front, or Send to Back.
Move a graphic or picture forward or backward
Editing Pictures, Shapes and Graphics
In Microsoft Office, pictures are photos that were created from another file and inserted into the document. Shapes and clip art are graphics generated within Word or Publisher. Formatting and editing options vary depending on the type of picture or graphic you are working with.
Grouping and ungrouping objects
Text and graphics may be grouped. To edit graphics individually, first ungroup them.
To ungroup objects:
Select the object you want to ungroup.
On the Format tab, in the Arrange group, click the Group icon, then select Ungroup.
To group objects:
Select the objects you want to group. Shift-click to select multiple objects.
On the Format tab, in the Arrange group, click the Group icon, then select Group.
Group or ungroup objects
Resizing a picture
Select the picture you want to resize.
Position the mouse pointer over one of the sizing handles.
Drag the sizing handle until the object is the shape and size you want. To maintain the object’s proportions, drag one of the corner sizing handles.
Cropping a picture
Select the picture you want to crop.
On the Format tab, in the Size group, click Crop.
Position the cropping tool over a cropping handle and drag the handle inward until the object is cropped the way you want it.
Crop a picture
Advanced formatting of a picture or graphic
Formatting options vary depending on the type of graphic you are editing.
Formatting pictures: Pictures can be resized, cropped, and color adjusted using brightness and contrast, converting color to black and white or grayscale.
Formatting graphics: Graphics can be resized, rotated, flipped, and colored. Add borders, patterns and other effects.
To format a picture or graphic:
Select the picture or drawing object you want to edit.
On the Format tab, click the editing option you would like to use.
Additional Microsoft Office Help and Resources
For help while using any Microsoft Office program, press F1.
Find help and support for Office 365, Office 2019, Office 2016, and Office 2013 at Microsoft.com.


 However, if your document is an 11 x 17″ spread designed for print, you will need to divide the document into single 8.5 x 11″ consecutive pages in order to make it view and read correctly.